
Doing RTI in the Basement
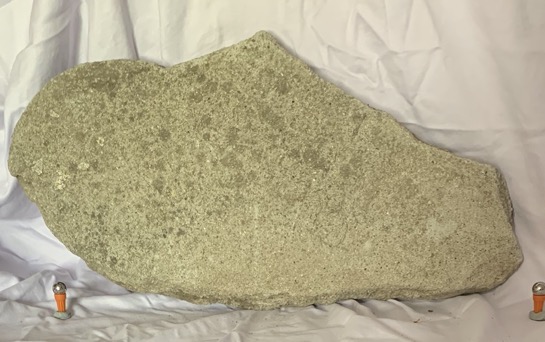
Last year when many of us were spending a lot of time overanalyzing various parts of our lives and dwellings because of COVID, I noticed a slab of cement in the front yard of my house that looked like it had some writing on it, but I couldn't read it.
At first, I got all excited because I thought it might be a tombstone. It's kind of the right shape, and who doesn't want to live in a haunted house, right? Unfortunately, on a closer look, it just seemed to be a part of a now non-existent sidewalk bearing the names of two people who loved each other. Who were these people, and when did they commit their love to wet cement? Unfortunately, though it was obvious that there were names and a date, they were also really hard to make out--and I spent a lot of time staring at this slab. Fortunately, technology provides an answer to this sort of problem.
Introducing RTI
RTI, Reflection Transformation Imaging is a technique used to simulate raking light on a surface and is used by conservators and others at museums to see textural details on a surface that are hard to see with the naked eye. Why not just get a light and use raking light, you ask? Well, if you build an RTI dataset, you only have to use potentially damaging light on your priceless artifact once to generate an RTI file. Then you can use the computer to simulate it whenever you need to check out the same hard-to-see detail on the surface.My understanding of how it works is this: given a set of photographs of an object which are identical except for the positioning of the light source, if you can figure out the angle of the light relative to the rest of the object, you can use the lightness and shadows in the photographs to calculate vertex normals for each pixel in the picture. If you have the vertex normals, you can predict how light will bounce off the surface in the photograph even if you don't know where that surface is in space. So, how does the computer figure out where the light is? Well, it cheats. In every picture, you include a ball bearing--an object that's guaranteed to be spherical--and the computer can calculate the angle of the light and the angle of reflection from the position of the highlight on the ball bearing!
A Minor Caveat (and by Minor, I Mean Major)
Four years ago, I took a workshop on RTI with Cultural Heritage Imaging (CHI) , the organization that pioneered the use of the RTI with cultural heritage and developed the software to build RTI files. I was thinking of proposing a seminar to teach it to fellow scholars, so I wanted to practice making sure I could still do it (and do it on my own). Unfortunately, I found out during this little experiment that, as of the time of writing, RTI is, for all intents and purposes, a thing of the past. This is because the only software available to process RTI files is RTIBuilder , developed by CHI. RTIBuilder has become so obsolete on Windows, Mac, and Linux that it can't be run on modern systems. With enough computer wizardry (think VMs) it can be run, but I suspect that most people won't want to put in the effort.Maybe because dead arts and obsolete skills are really interesting to me, maybe because I don't like being told "no" by a computer, and maybe because I still think RTI has the potential to be a very useful tool for the digital humanist, I'm going to devote the next two posts to telling you how to use RTI anyway. The first post will be about image capture, the second will be about bending the computer to your will.
Equipment
The first thing I needed was a space where I could set up the camera and the subject (ie. a largeish slab of cement), and where I had a lot of control over lighting. At my house, that's the basement, which is an exciting and scary place in its own right. According to the image capture guide which CHI has provided, you need a color neutral backdrop (p 11), which I read as "old bedsheet". You probably need some sort of color card for doing white balance, even though I couldn't find mine. You also need a tripod and a DSLR camera.You can buy a kit from CHI for ~$370 which includes a monopod, some reflective black spheres. But this was expensive and not enough of a challenge. If you have an old-master painting , tomb-stela or attic vase that you need to analyze, you probably shouldn't cheap out here. You should probably also buy some sort of UV filter for your light as CHI recommends. Those who do science in the basement do what they must because they can. (GlaDOS, 2007) So, I went to the hardware store and bought a utility light, a bulb, and some ball bearings for about $27.
CHI's manual says that the reflective spheres ought to be at least 250 x 250 pixels in your photographs (Guide for Capture, 2013, p 12), so if your object is large, you should get big ball-bearings. You also need a "monopod", but what you really need is a stick to put the light on. I applied mine to a mop handle with a generous helping of tape.
Set up your camera on the tripod and your object on the neutral background so that the object fits in frame along with the color card. Position the ball bearings close to the plane of your object. I put two next to mine. Also, you should find some way that as much of the spherical surface of the ball bearing as possible is exposed to the camera and the light. Putting them on a golf-tees stuck in putty would work. I used some little plastic things I found around the house.
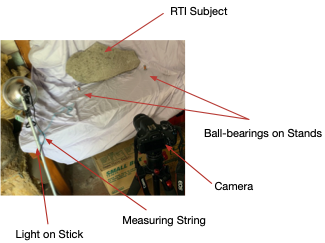
Take a piece of string and measure the distance between the center of your object and the camera with it. Tie a knot in it at that length. I then tied it under my light on my light-stick apparatus. You will use this string to position the light relative to the object in each picture. My setup, with the slab, ball-bearings, camera, and light-apparatus looks like this:
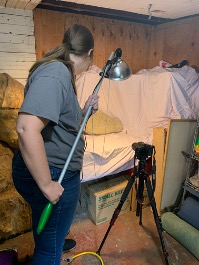
Focus the camera, set the aperture so that your whole object can be in focus. Set the ISO as low as you can and the shutter speed as low as it needs to be to compensate for the low light and small aperture. Manually focus and leave it alone--since the camera and object aren't moving, you don't need to tweak anything! The rest is a two-person operation. One person needs to position the light and hold it and the other person needs to take the picture and check to make sure it turned out and there weren't any hands or poles or strings in it.
You ought to turn out the lights and shut the blinds such that any reflection in your ball-bearing is caused by the light you are waving around and not the sun or the lightbulb on the ceiling.
 To avoid jostling the camera, you should set up remote shooting. You can do this like CHI does, by attaching a computer to the camera with or without wires and controlling the camera from the computer via the software that comes with the camera. I recently learned I could control my camera via a phone or Ipad, and that's how my assistant took the pictures. If you have a Canon DSLR camera, and an iOS device, look for EOSUtility on the App store. Another option is to set the timer so that you can push the button on the camera, and the shutter will trigger after your hand is away. And, if I was working with a Ming vase, that unsecured extension cord that I have on the ground and perilously close to my feet would be a bad idea, but really the only thing in danger here are my camera or my teeth, so YOLO!
The person holding the light has the "hard' job. Basically, imagine a half-spherical umbrella around your object. Umbrellas usually have this collapsible jointed frame with metal supports. Imagine there is a metal support for each hour on the clock, and move down the support, holding the light and taking a picture at every joint on each metal support of your imaginary umbrella. You use the string to measure to the center of your object making sure the object is equidistant in each picture. Position the light, reel in the string, and call out to the photographer to trigger the shutter. If you find this whole simile confusing, the CHI has some good diagrams to consult on pages 29-30 of their guide (Guide for Capture, 2013).
I took about 30 pictures, and I admit that because of the low ceiling of my basement and the size of the table on which I had my slab, and some of my positions were not quite accurate, and the edge of the table might have blocked some light in some shots. However, all in all, I think I got decent coverage. If I had to do it over again, I'd find a way to prop up the slab closer to the edge of the table so I could get some lower light angles on the ball-bearings.
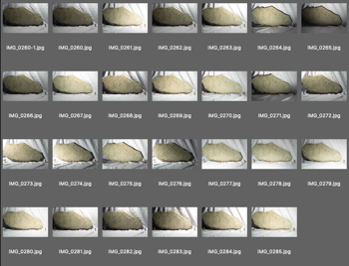 Import the pictures to your computer. I use the import function in Adobe Bridge and convert them to DNG files that have the RAW files built into them. If you are using JPGs, make sure they are the highest quality possible. At this point, you can use the tool of your choice to zero out any settings that the camera may have automatically set, like sharpening. You can also adjust exposure and white balance correction. I use Adobe Camera RAW for this, and I ensure that any operation that I do is applied to all the pictures in the set. If you need more detailed instructions on this, check out CHI's guide for RTI processing . It uses an old version of Adobe Camera RAW (CS3), but the instructions are pretty much the same (Version CC 2017). Here were my results after having been adjusted for white balance and exposure, and after having been re-saved to jpg.
Processing
Now, if RTIBuilder just worked, and for now we will pretend that it does even though it doesn't, I would follow the instructions set out in the manual that CHI provides. Basically, you have to set up the directory structure according to the instructions. I have a directory called RTI, and in it I have a directory called "jpeg-exports" in which I put all of my JPEGs that I exported from Camera RAW.
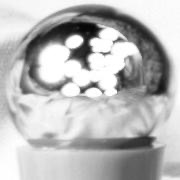 RTIBuilder seems confusing at first, but you will use the "Highlight based HSH Filter" which comes with the software. You basically have to tell the software the location of one of your ball bearings (you can do both if you are an overachiever. I'm not sure it really matters) by drawing a selection around them. Then you have to make sure it detects the dimensions of your ball-bearing correctly, then you have to make sure that it picks up where the highlight is on your ball bearing. On the left you can see the reflection of the edge of my work table and the combined highlight from all of my pictures reflected in the ball-bearing--the sort of spread you'd expect from someone who was just kinda following the instructions. But, having ascertained that the highlights were correctly detected, I performed a ritual incantation and burnt an offering over the keyboard and pushed the magic "execute" button to build my RTI.
Results
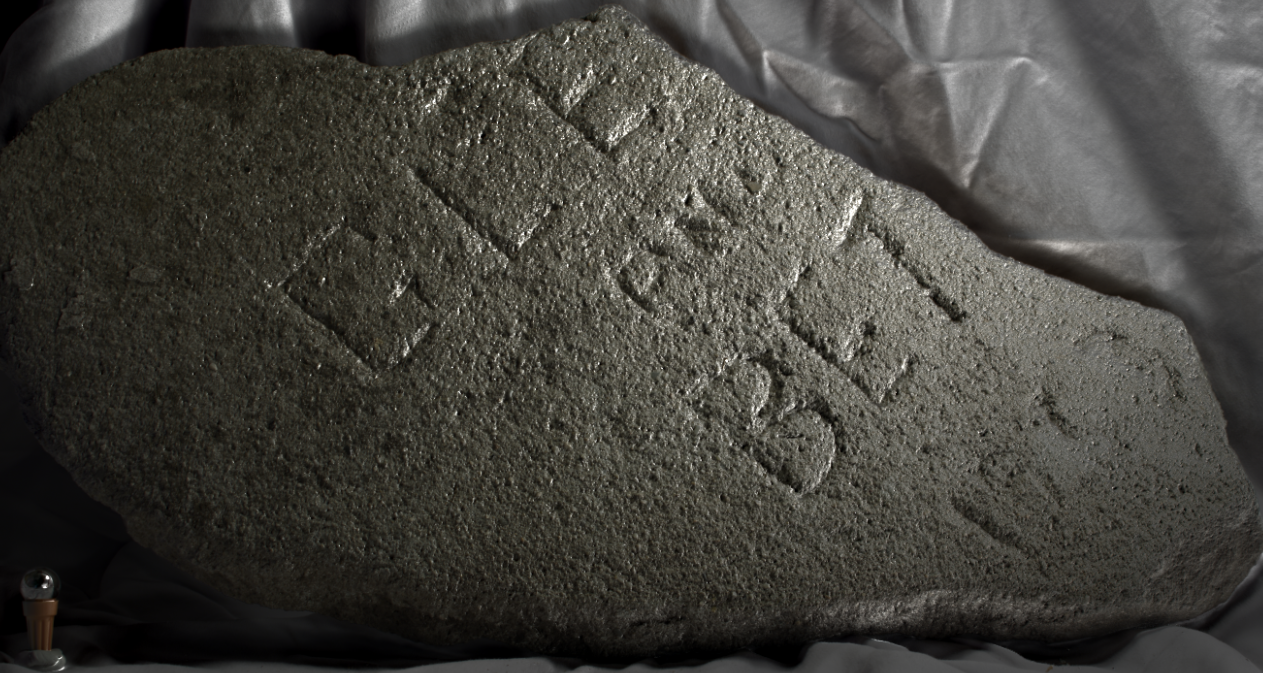
If the gods of computers are smiling upon you, you will get an RTI file which you can then open in CHI's RTI Viewer and other RTI viewers that I have not used (I've heard there's a plugin for ImageJ that does it. CHI's viewer should work on MacOS Catalina. Having succeeded in my RTI experiment, I took a screencapture of the slab in RTI viewer. Then my computer crashed and I apologized to it for all the things I had done, and I went to bed. However, we can now say with certainty that "GLE[...] and BET[...] 1953." I think given the size of the stela, we can fill in the lacuna and say that at some point in 1953, GLEN or BETH wrote their names in the sidewalk with a stick, either out of mutual affection or out of wishful thinking. Maybe the moment was important in the later lives of the owners of the house, because the same section of pavement was saved and recycled when the sidewalk was destroyed at an indeterminate later date.
Here's a screenshot if you really want to give it a close look. Tune in next time if you want to learn the correct ritual words and objects to use in order to run RTIBuilder on a modern machine!
References
- ‘Reflectance Transformation Imaging: Guide to Highlight Image Capture v.2.0’ (Cultural Heritage Imaging, 2013) <http://culturalheritageimaging.org/What_We_Offer/Downloads/RTI_Hlt_Capture_Guide_v2_0.pdf> [accessed 19 August 2021]
- ‘Reflectance Transformation Imaging: Guide to Highlight Image Processing v. 1.4’ (Cultural Heritage Imaging, 2011) <http://culturalheritageimaging.org/What_We_Offer/Downloads/rtibuilder/RTI_hlt_Processing_Guide_v14_beta.pdf> [accessed 19 August 2021]
- GlaDOS 2007 was a joke. If you didn't get it, you should play the 2007 game, Portal, or at least listen to the themesong from the game, "Still Alive" by Jonathan Coulton.